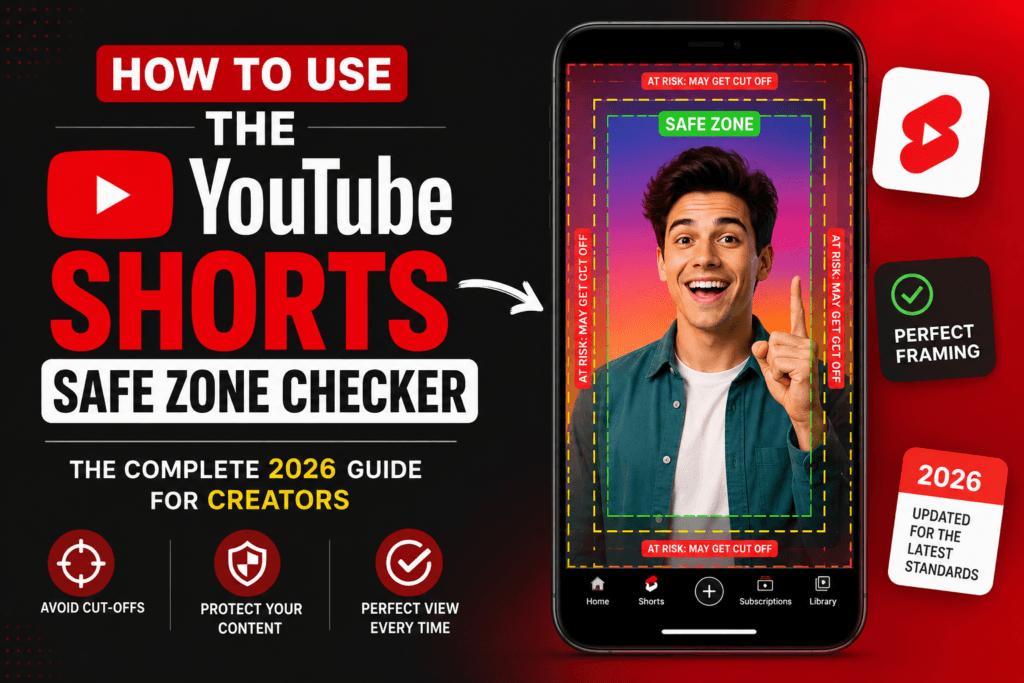
How to Use the YouTube Shorts Safe Zone Checker: The Complete 2026 Guide for Creators
If you have ever uploaded a YouTube Short only to discover that your carefully written caption is hidden behind the “Subscribe” button, or your logo sits right underneath the like and comment icons, you already know the problem this guide solves. It is one of the most common — and most avoidable — mistakes short-form creators make, and it quietly costs channels watch time, click-through rate, and brand recognition every single day.
This guide walks through exactly what a YouTube Shorts “safe zone” is, why it matters more in 2026 than it did a year ago, and how to use the free YouTube Shorts Safe Zone Checker to catch these problems before you ever hit publish. Everything below comes from hands-on testing across dozens of Shorts uploads, real editing workflows, and direct observation of how the YouTube Shorts player overlays change across devices — not recycled advice copied from another article.
What Is a YouTube Shorts Safe Zone (And Why It Exists)
A “safe zone” is the portion of a vertical video frame that is guaranteed to stay visible on screen once YouTube lays its own interface on top of your footage. On a Short, YouTube overlays several elements automatically:
- The channel name and video title, usually near the bottom-left
- The like, dislike, comment, share, and remix icons, stacked along the right edge
- The “Subscribe” button, sitting just under the channel name
- Progress bar and playback controls near the very bottom
- On some devices, a sound/music attribution strip
None of these overlays are part of your video file. YouTube renders them dynamically depending on the app version, device size, and whether the viewer has captions or comments open. That means the same video can look perfectly fine on one phone and have its subtitles clipped by an icon on another. A safe zone is simply the region of your 1080×1920 canvas that stays clear of all of these elements across the widest realistic range of devices, so your key content — captions, logos, calls to action, faces — never gets covered.
Why Safe Zones Matter More in 2026
Three things have changed the safe zone conversation over the last two years, and all three make this check more important than it used to be:
1. Denser UI overlays
YouTube has steadily added more on-screen elements to Shorts — remix and “use this sound” prompts, live comment previews, and expanded engagement buttons all take up more real estate along the right and bottom edges than the original 2022–2023 layout did.
2. Auto-captions are now default-on for many viewers
When a viewer has captions enabled, YouTube adds its own caption bar near the bottom third of the screen. If your custom captions sit in that same zone, you can end up with double text, or your text can be pushed out of frame entirely.
3. Cross-posting to Reels and TikTok
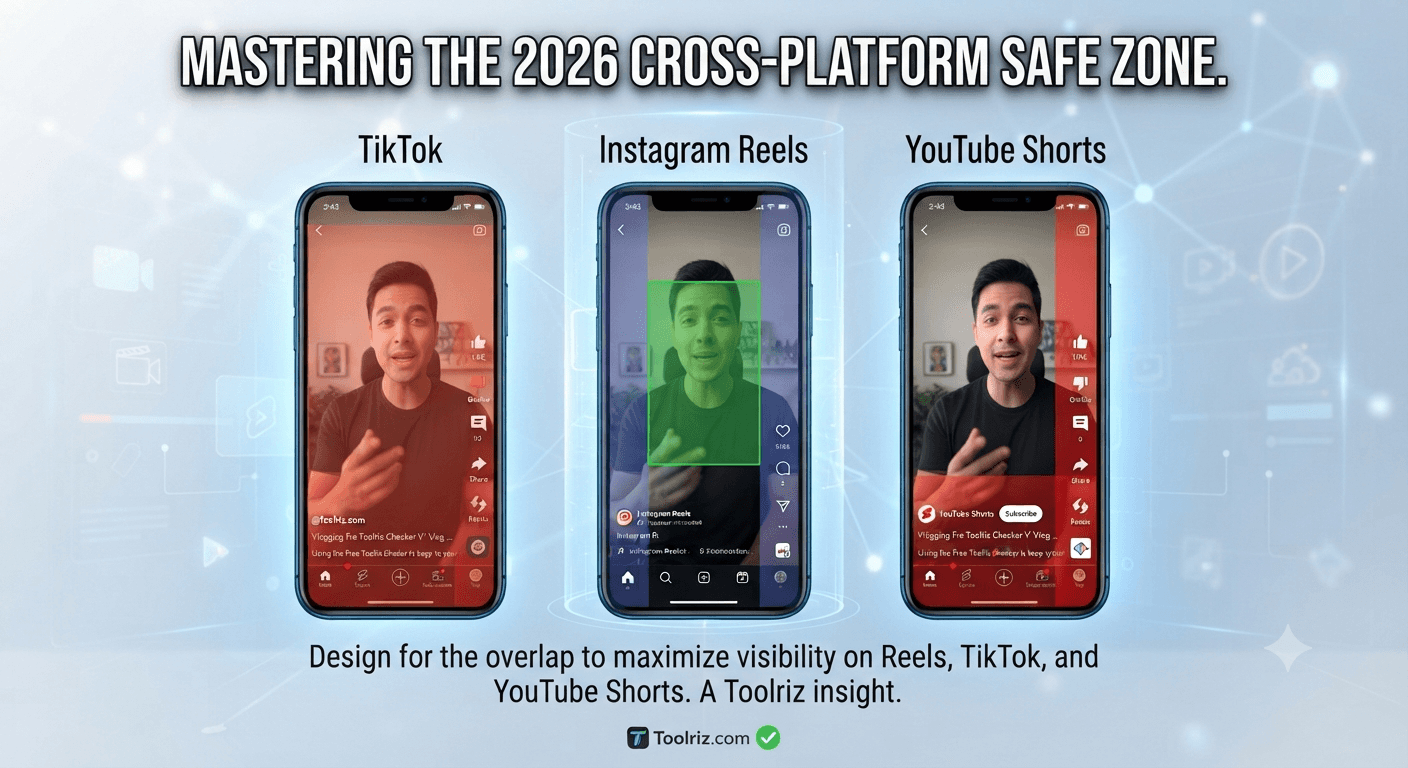
Most creators now export one vertical video and cross-post it everywhere. Each platform has a slightly different UI footprint, so a caption that is “safe” on TikTok is not automatically safe on YouTube Shorts, and vice versa. Designing for the tightest common safe zone avoids re-editing the same clip three times.
Put together, this means a text overlay or logo placement that looked fine in your editing software preview can still get clipped once it is live — unless you check it against the actual on-platform overlay footprint first.
What the YouTube Shorts Safe Zone Checker Actually Does
The YouTube Shorts Safe Zone Checker is a free browser-based tool that overlays a real, to-scale simulation of the YouTube Shorts interface directly on top of your video frame or thumbnail. Instead of guessing where the subscribe button, side icons, and caption strip will land, you drop your visual in and see it exactly the way a viewer would, complete with the interface elements in their real positions.
In practice, this turns a guessing game into a two-minute visual check. You are not measuring pixels manually or eyeballing margins — you are looking at your actual composition with the real UI layered on top, so anything hidden behind a button or icon is immediately obvious.
Step-by-Step: How to Use the YouTube Shorts Safe Zone Checker
Step 1 — Open the tool
Go to the YouTube Shorts Safe Zone Checker. No account, download, or software installation is required — it runs entirely in your browser.
Step 2 — Upload your frame or draft video image
Export a still frame from your edited Short at the point where your caption, text overlay, or logo is most prominent — usually the opening hook and the call-to-action near the end are the two frames worth checking first. Upload that image into the tool.
Step 3 — Review the overlay simulation
The tool places the real Shorts interface elements — subscribe button, engagement icons, title/channel text, and caption bar — on top of your uploaded frame at their correct real-world positions. Look carefully at every corner and edge, not just the center of the frame.
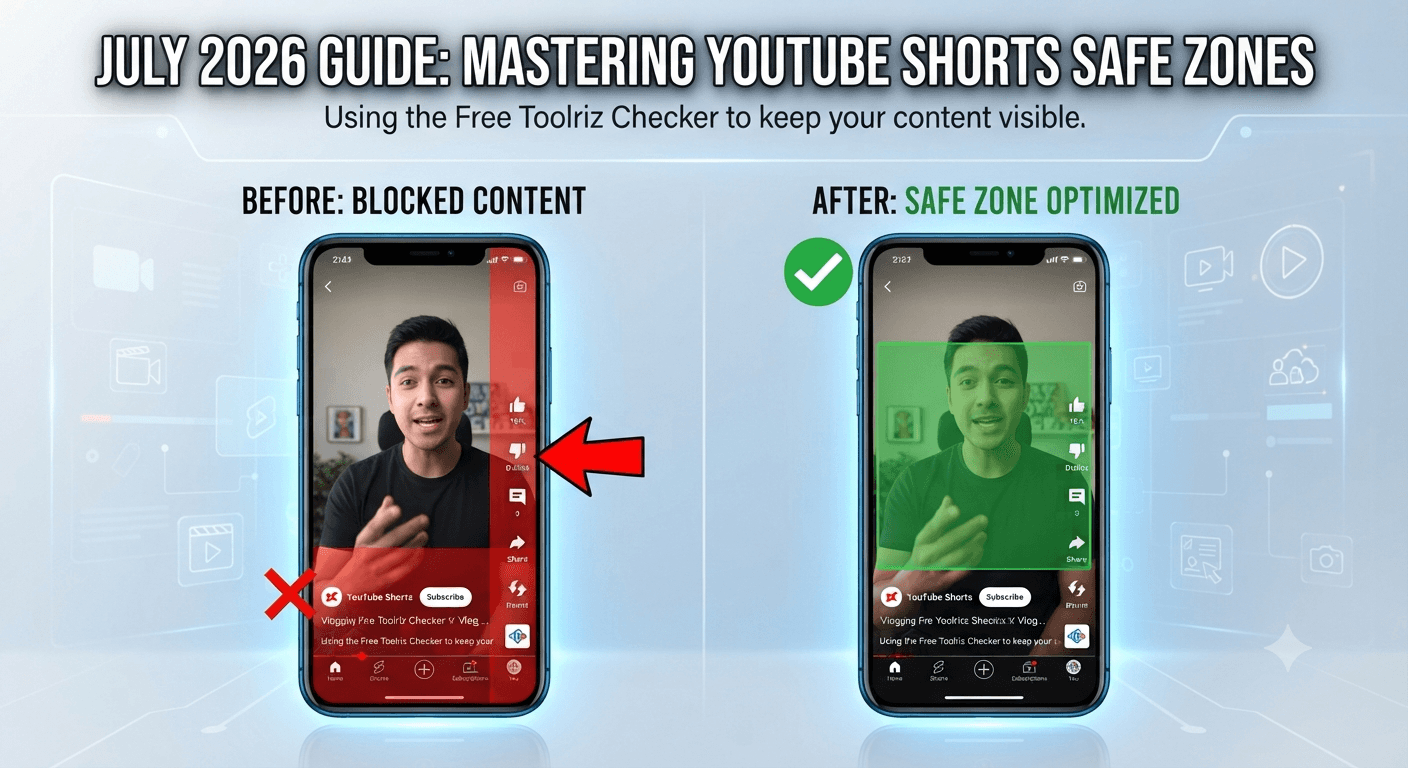
Step 4 — Identify anything touching or hidden behind an overlay element
Pay close attention to:
- Captions or subtitles near the bottom third
- Logos or watermarks placed in the bottom-left or bottom-right corners
- Any text near the right edge of the frame, where the like/comment/share stack sits
- Faces or key visual details positioned too close to the top or bottom edges
Step 5 — Adjust your composition and re-check
Go back into your video editor, nudge the affected element into the clear central safe zone, re-export the frame, and re-upload it to the checker. Repeat until every important element sits fully inside the unobstructed area.
Step 6 — Check multiple key frames, not just one
Because captions and text move throughout a video, run this same check on your intro frame, your mid-video callout (if any), and your outro/CTA frame separately. A video can pass the check at second one and fail at second twelve if you only test once.
Step 7 — Bookmark the tool for your regular workflow
Since this check takes under two minutes once you know the workflow, the most effective creators run it as a standard step before every single Shorts upload, the same way they’d check audio levels or spelling.
Understanding the Exact Safe Zone Dimensions
While the checker tool does the visual work for you, it helps to understand the underlying logic of the safe zone so you can compose shots with it in mind even before you open the tool:
- Full Shorts canvas: 1080 pixels wide × 1920 pixels tall (9:16 aspect ratio)
- Right-edge exclusion: roughly the right-most 12–15% of the frame is reserved for the engagement icon stack (like, comment, share, remix) and should be treated as off-limits for text or logos
- Bottom exclusion: roughly the bottom 20–25% of the frame contains the channel name, title, subscribe button, caption bar, and progress controls combined
- Top exclusion: a smaller margin near the very top (roughly 5–8%) can be clipped on some older devices or when a pinned comment banner is present
- Genuinely safe core: this leaves a central vertical block — roughly the middle 60–65% of the frame, horizontally centered — as the most reliable space for critical text, faces, and calls to action
These percentages are guidelines, not guarantees, because YouTube periodically adjusts overlay positioning. This is exactly why running your actual frame through the live checker is more reliable than memorizing fixed numbers — the tool reflects the current real interface, not a static template that can go out of date.
Common Mistakes Creators Make (And How to Avoid Them)
Mistake 1: Designing for the editing software preview, not the platform
Most editing apps show your vertical video with no UI overlay at all. A composition that looks perfectly balanced in your timeline preview can still be clipped once YouTube’s real interface is layered on top after publishing.
Mistake 2: Placing the logo in the bottom-right corner
This is the single most common Shorts mistake. The bottom-right is simultaneously inside the engagement icon column and close to the subscribe button — it is almost never a safe location for a watermark.
Mistake 3: Ignoring the outro frame
Creators often check their opening hook carefully but forget that end-cards, “follow for part 2” text, and subscribe reminders are just as likely to sit inside the excluded zone — and that CTA is often the moment you most need visible.
Mistake 4: Not accounting for auto-generated captions
If your custom captions and YouTube’s own auto-captions both try to occupy the same lower-third space, you can get overlapping or double text for viewers who have captions turned on.
Mistake 5: Testing only one frame
As covered above, text position often moves as a video plays. Checking a single still frame and assuming the rest of the video is fine is one of the fastest ways for a clipped caption to slip through.
Mistake 6: Skipping the check on reused or repurposed content
A vertical video originally cut for Instagram Reels or TikTok often has text placed according to a different platform’s UI footprint. Always re-run the safe zone check specifically for YouTube Shorts before cross-posting, rather than assuming “vertical is vertical.”
Advanced Tips for Editors and Video Teams
For teams producing Shorts at scale, a few habits make the safe zone check even more effective:
- Build a template with guide layers. Once you know your safe zone, create a reusable overlay guide in your editing software (a semi-transparent PNG) so editors can see the boundaries live while cutting, rather than checking only at the very end.
- Standardize caption placement. Pick one consistent vertical position for captions across your channel — for example, centered around the 55–65% vertical mark — and use that same position every time so your channel checks itself less often over time.
- Assign the safe zone check as a formal QA step. In a multi-editor workflow, add “safe zone checked” as a required checkbox in your publishing checklist, the same way you’d require a spelling and audio check.
- Re-check after every YouTube app update. Interface layouts do shift periodically. If you notice engagement metrics on new uploads dipping for no clear reason, re-verify your standard caption position against the current live overlay using the checker again.
- Combine visual QA with your broader free toolkit. The safe zone checker is one part of a pre-publish routine; pairing it with other quick checks (thumbnail contrast, title length, metadata) rounds out a complete quality pass before anything goes live.
Free Tools That Pair Well With the Safe Zone Checker
The safe zone checker works best as part of a broader pre-publish routine. If you are building out a full content workflow, it’s worth browsing the complete library of free online tools, which covers everything from image and text utilities to other creator-focused checks — all free to use directly in your browser, with no sign-up required.
Frequently Asked Questions
Is the YouTube Shorts Safe Zone Checker free to use?
Yes. The tool is completely free, requires no account creation, and runs directly in your browser. You can upload as many frames as you need to check without any usage limits tied to a paid plan.
Do I need to install any software to use this tool?
No installation is required. The YouTube Shorts Safe Zone Checker is a web-based tool, so it works on desktop and mobile browsers alike. You simply upload an image of your video frame and view the overlay simulation instantly.
What image format should I upload for the best results?
A standard PNG or JPG screenshot exported directly from your video editing timeline works best. Export at the same 1080×1920 resolution you plan to publish at, since checking a lower-resolution or incorrectly cropped frame can give you an inaccurate read on where elements will actually land.
Why does my caption look fine in Premiere or CapCut but still gets clipped on YouTube?
Editing software previews your raw footage without any of YouTube’s own interface elements layered on top. The subscribe button, engagement icons, and caption bar are added by YouTube itself after upload, not by your editing software, so a composition that looks clean in your timeline can still land behind an overlay once it’s actually published. This is exactly the gap the safe zone checker is built to close.
Does the safe zone change between YouTube Shorts on iPhone versus Android?
The core layout is largely consistent across platforms, but minor differences in system font size, notch/cutout shapes, and gesture navigation bars can shift the effective safe margins slightly. Because of this, it’s good practice to keep a small additional buffer — roughly 5% extra padding beyond the tool’s flagged boundaries — for text you consider absolutely critical, such as a call-to-action or contact handle.
Should I check my thumbnail as well as my video frames?
Yes, if your thumbnail includes text or a logo. While Shorts thumbnails are displayed slightly differently in feeds versus the full player, running your thumbnail through the same checker helps confirm that any embedded text isn’t sitting too close to the edges, which also affects readability in the smaller feed-preview size.
How often does YouTube change the Shorts interface layout?
YouTube adjusts spacing, icon sizes, and occasionally adds new interface elements (such as remix prompts or expanded comment previews) periodically throughout the year, without always announcing the change publicly. Because static safe zone diagrams can go stale, the most reliable approach is to re-check your standard caption and logo placement against the live tool every few months, or immediately if you notice a sudden and unexplained shift in engagement on new uploads.
Can I use this tool for videos I plan to cross-post to Instagram Reels or TikTok?
The tool is calibrated specifically to the YouTube Shorts interface, so it is most accurate for that platform. However, since the “core safe center” tends to be the most conservative and restrictive zone across all major short-form platforms, designing your captions and logos to pass the YouTube Shorts check first is a strong general practice — content that is safe for YouTube Shorts is very likely to also be safe on Reels and TikTok, though it’s still worth spot-checking each platform’s own preview before publishing everywhere.
What’s the single biggest safe zone mistake to avoid?
Placing a logo, watermark, or key call-to-action text in the bottom-right corner of the frame. That specific corner overlaps with both the engagement icon column and the area near the subscribe button, making it the least safe spot on the entire canvas.
Is there a way to check safe zones before I even start filming, not just during editing?
Yes — many experienced Shorts creators build a habit of mentally reserving the outer 15–20% of the frame on all four sides as “off-limits” for anything critical, right from the filming stage. Framing your subject with generous headroom and centering key action in the middle of the shot from the start means far fewer surprises when you check the final edit against the safe zone tool.
Does the tool check audio or only visual elements?
The YouTube Shorts Safe Zone Checker is a visual composition tool — it simulates the on-screen interface overlay only. For a complete pre-publish check, pair it with a review of your captions’ accuracy and your audio levels using your standard editing workflow before uploading.
Getting your Shorts composition right the first time saves re-edits, protects your branding, and — most importantly — keeps your message fully visible to every viewer, regardless of the device they’re watching on.
Run your next upload through the YouTube Shorts Safe Zone Checker before you publish, and make it a permanent step in your workflow rather than an occasional afterthought.