

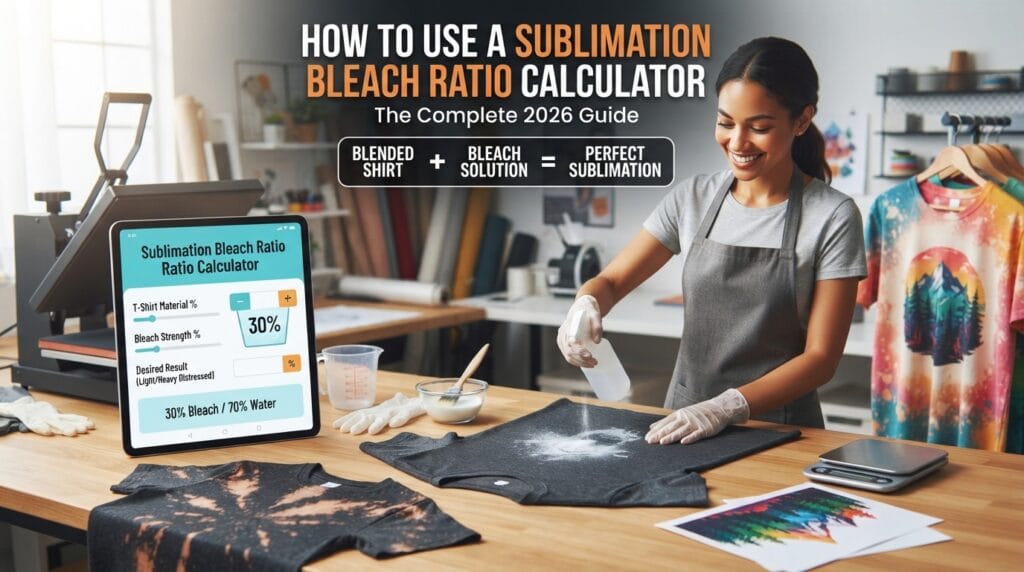
How to Use a Sublimation Bleach Ratio Calculator: The Complete 2026 Guide
A precise bleach-to-water ratio is the difference between a crisp, vibrant sublimation transfer and a blotchy, damaged blank. Here’s exactly how to calculate it, use it, and get repeatable results every time.
actually needs
If you’ve spent any time in sublimation or DTF-adjacent Facebook groups, you’ve seen the same debate repeat itself: someone bleaches a 100% cotton blank, sublimates a design onto it, and either gets a gorgeous faded-vintage result — or ends up with a stiff, yellowed, half-dissolved shirt that has to go straight in the trash. The difference almost never comes down to luck. It comes down to ratio.
Bleaching for sublimation isn’t the same as bleaching laundry. You’re not trying to whiten a stain — you’re trying to strip just enough color from a cotton or cotton-blend garment to create a light, sublimation-receptive canvas without destroying the fibers, weakening the weave, or leaving a patchy, unpredictable base. That takes a specific, measurable bleach-to-water ratio tailored to the fabric’s weight and fiber content, which is exactly why tools like the Sublimation Bleach Ratio Calculator exist — to turn a guessing game into a repeatable formula.
This guide walks through what the calculator does, the science behind why ratio matters so much, a full step-by-step workflow, real reference charts for different fabric weights, the mistakes that ruin the most blanks, and a detailed FAQ section so you can bookmark this once and never have to Google “how much bleach for a sublimation shirt” again.
Direct AnswerWhat Is a Sublimation Bleach Ratio Calculator?
A sublimation bleach ratio calculator is a free online tool that tells you the exact bleach-to-water ratio and soak time needed to safely lighten a specific fabric — based on its weight, fiber blend, and how faded you want the final result — so your bleached blank sublimates evenly without damaging the material.
Instead of eyeballing a bleach solution the way many crafters did in the early days of sublimation blanks, the calculator asks for a few known variables — fabric weight (usually in ounces per square yard), cotton percentage, and desired fade level — and returns a precise ratio, such as 1 part bleach to 2 parts water, along with a recommended soak or spray time. You can find the live version of this tool here: Sublimation Bleach Ratio Calculator.
FoundationWhy the Bleach Ratio Is the Make-or-Break Variable
Sublimation ink only bonds properly to polyester or a polyester coating — it doesn’t bond well to raw cotton fibers. That’s why crafters bleach cotton and cotton-blend garments first: the bleaching process breaks down the natural cotton dye and opens the fiber slightly, creating a lighter, more receptive surface that reads sublimated colors with far more accuracy than an unbleached cotton tee ever could.
But bleach is not a gentle chemical, and cotton is not a uniform material. A ratio that’s too strong can weaken the weave, create holes after a wash or two, or turn the fabric a dull yellow instead of the crisp white or cream you’re aiming for. A ratio that’s too weak leaves you with an uneven, blotchy canvas that shows through your sublimated design in patches — a problem that only becomes obvious after you’ve already pressed and ruined a transfer.
Because different fabrics absorb and resist bleach at different rates, a single “one ratio fits all” approach almost never works across a full product line. A lightweight tri-blend tee and a heavyweight 100% cotton hoodie need genuinely different formulas — which is the entire reason a calculator, rather than a rule of thumb, produces more consistent results batch after batch.
heavyweight cotton
midweight cotton
lightweight tees
poly-cotton blends
Reference starting points only — always confirm your exact ratio with the calculator and test on a scrap swatch before running a full batch.
The ChemistryThe Science: How Bleach Reacts With Cotton (and Why Blends Behave Differently)
Household bleach is a sodium hypochlorite solution. When it contacts cotton, the hypochlorite ions oxidize the natural pigments in the cellulose fiber, essentially breaking apart the molecular bonds that give raw cotton its cream or off-white tone. This is what produces that soft, sun-bleached look sublimation crafters chase — but the same oxidation process that strips color is also, chemically, a mild degradation of the fiber itself. That’s why concentration and contact time both matter enormously.
Polyester, by contrast, is a synthetic fiber that’s largely resistant to sodium hypochlorite. This is exactly why poly-cotton blends bleach unevenly: the cotton portion of the fabric lightens while the polyester portion barely changes, which is what creates that mottled, marbled “bleach tie-dye” texture you’ll see on 50/50 blends. A calculator that accounts for blend percentage adjusts the ratio so the visible fade lands where you actually want it, rather than leaving you to guess how a 60/40 blend will react differently than a 100% cotton piece.
Fabric weight adds a third variable. A heavyweight 6 oz+ cotton tee has denser, tighter-packed fibers, which means bleach needs a slightly higher concentration or longer contact time to penetrate evenly. A lightweight 4 oz tee, on the other hand, can over-bleach in a fraction of the time, so a “one-size” ratio applied across your whole product catalog will consistently over- or under-process at least some of your inventory.
WalkthroughStep-by-Step: How to Use the Sublimation Bleach Ratio Calculator
Here’s the exact workflow to go from a raw cotton blank to a properly bleached, sublimation-ready canvas.
- Identify your fabric’s fiber content and weight.Check the garment tag for the cotton/polyester percentage and, if listed, the fabric weight in ounces per square yard. If it’s not printed, a rough estimate (lightweight, midweight, heavyweight) is enough to start.
- Open the calculator and enter your fabric details.Head to the Sublimation Bleach Ratio Calculator and input the fiber blend and fabric weight you identified in step one.
- Choose your desired fade level.Select subtle, medium, or heavy fade depending on the final look you want — subtle keeps more of the fabric’s natural tone, heavy pushes toward a near-white canvas for maximum color vibrancy.
- Record the output ratio and soak/spray time.The calculator returns a bleach-to-water ratio (for example 1:2) along with a recommended contact time. Write both down before mixing anything.
- Mix your solution in a well-ventilated area.Use a plastic spray bottle or a dedicated bleaching bin — never a metal container, which can react with bleach and stain fabric.
- Test on a scrap swatch or hidden seam first.Even with a calculated ratio, fabric dye lots vary. A 5-minute test swatch saves you from ruining a full batch of blanks.
- Apply evenly and monitor closely.Spray or soak according to your ratio, keep the fabric flat and unwrinkled so the fade is even, and check progress every couple of minutes rather than walking away.
- Neutralize, rinse, and dry completely.Rinse thoroughly with cold water, run a neutralizing rinse (a diluted hydrogen peroxide or specialty stop-bleach solution works well), then dry fully before pressing your sublimation transfer.
Never skip the neutralizing step. Residual bleach left in the fibers keeps oxidizing after you’re done, which is one of the most common reasons blanks develop holes days or weeks after bleaching — long after the crafter assumes the process is finished.
Reference DataBleach Ratio Chart by Fabric Weight
The chart below shows typical starting bleach concentrations (as a percentage of the total solution) crafters commonly use as a baseline across different fabric weights, before fine-tuning with the calculator for exact blend and fade preferences.
Typical Starting Bleach Concentration by Fabric Weight
Reference DataRecommended Soak Time by Fabric Type
Concentration is only half the equation — contact time determines how deeply the bleach penetrates. Here’s how recommended soak time typically scales alongside fabric weight.
Recommended Soak Time by Fabric Type
Avoid TheseCommon Mistakes That Ruin Bleached Sublimation Blanks
Free-pouring bleach “until it looks about right” is the single biggest cause of holes, yellowing, and inconsistent batches. Always calculate first.
Treating a 50/50 blend the same as 100% cotton produces patchy, marbled fades instead of an even canvas.
Dye lots vary between garment batches, even from the same brand and size run. A quick test avoids full-batch losses.
Folds and wrinkles block even bleach contact, creating light and dark stripes exactly where the fabric creased.
Bleaching isn’t “set it and forget it” — checking every couple of minutes prevents over-processing.
Bleach that isn’t neutralized keeps working after you think you’re done, weakening fibers over the following days.
Level UpPro Tips for Consistent, Repeatable Results
- Batch by fiber content, not just by size. Group garments with the same blend and weight together so one calculated ratio applies cleanly across the whole batch.
- Keep a swatch log. Note the ratio, soak time, and result for each garment style you bleach regularly — over time this becomes your own personal reference sheet, faster than recalculating from scratch every time.
- Use room-temperature water. Hot water accelerates the bleaching reaction unpredictably; room temperature gives you more control and a more even fade.
- Press a test sublimation transfer on your first bleached swatch before running a full production batch — the fade level that looks right to the eye doesn’t always sublimate the way you expect.
- Store your bleach solution ratios by product line if you sell finished goods, so reordering the same shirt style always reproduces the same faded base.
ImportantSafety Precautions When Bleaching Fabric for Sublimation
Bleach is an effective tool, but it’s still a hazardous chemical that deserves respect. Work in a well-ventilated space — outdoors or near an open window is ideal — and never mix bleach with ammonia-based cleaners, which produces toxic chloramine gas. Wear nitrile gloves and eye protection, especially if you’re spraying rather than soaking, since aerosolized bleach can irritate eyes and airways. Keep a dedicated set of plastic containers, spray bottles, and tools for bleaching that never get used for food prep, and store concentrated bleach out of reach of children and pets. If you’re bleaching indoors regularly, a small fan or open-air setup goes a long way toward keeping fumes from building up in an enclosed craft room.
Skip the guesswork on your next batch. Get your exact bleach-to-water ratio and soak time in seconds.
Open the Calculator →AnswersSublimation Bleaching FAQ
What is the best bleach-to-water ratio for sublimation shirts?
There’s no single universal ratio — it depends on fabric weight, fiber blend, and desired fade level. Lightweight cotton tees typically need a weaker solution than heavyweight cotton or fleece. Use a calculator that accounts for these variables rather than relying on a fixed rule of thumb.
Can you bleach a polyester-cotton blend for sublimation?
Yes, but blends bleach unevenly because polyester resists sodium hypochlorite while cotton doesn’t. Blends generally need a more carefully calculated, often gentler ratio to avoid an overly patchy, marbled result.
How long should you soak a shirt in bleach before sublimating?
Soak time scales with fabric weight — lightweight tees often need only a few minutes, while heavyweight cotton or fleece can take considerably longer. Always check progress every couple of minutes rather than following a fixed timer blindly, since dye lots vary.
Why did my bleached shirt develop holes after washing?
This is almost always caused by residual bleach that wasn’t fully neutralized and rinsed out. Bleach that stays active in the fibers continues to oxidize the fabric over time, weakening it until it tears, sometimes days or weeks after the original bleaching session.
Do you need a calculator, or can you just eyeball the ratio?
You can eyeball it, but results become inconsistent across different fabric weights and blends, which is a major problem if you’re producing multiple garments for sale. A calculator removes the guesswork and makes results repeatable batch after batch.
What’s the difference between spray bleaching and soak bleaching?
Spray bleaching gives more control over placement and is common for creating patterns or tie-dye effects, while soak bleaching produces a more uniform, even fade across the entire garment — better suited for a clean sublimation base.
Is bleaching necessary for all sublimation blanks?
No — polyester and poly-coated blanks don’t need bleaching at all, since sublimation ink bonds directly to polyester. Bleaching is specifically a technique for making cotton and cotton-blend garments sublimation-receptive.
Final Thoughts
Bleaching for sublimation rewards precision far more than intuition. Once you treat the bleach-to-water ratio as a real formula — tied to fabric weight, fiber blend, and desired fade — the guesswork disappears, and so does the frustration of ruined blanks and inconsistent batches. The Sublimation Bleach Ratio Calculator exists to make that formula instant, so you can spend less time troubleshooting failed shirts and more time actually producing finished work.
If you’re building out a full sublimation or print-on-demand workflow, it’s worth pairing this calculator with the rest of ToolRiz’s free online tools, and browsing more craft and print guides over on the ToolRiz blog for deeper dives into related techniques.